Part 2. Windows firewall setting.
Part 3. Change the remote listening port.
Part 4. Connect!
Part 1.
From Microsoft.comGet started using Remote Desktop with Windows XP Professional
To use Remote Desktop
With Remote Desktop, you can connect to your work computer from home and access all of your programs, files, and network resources as though you were actually sitting in front of your computer at work.
You need three things to create a remote location:
1. |
Microsoft Windows XP Professional must be installed on the computer containing the files and programs that you want to access from a remote computer. The computer must also be part of a corporate network in which Remote Desktop connections are permitted. This computer is known as the host. |
2. |
The remote computer must be running Windows 95 or later. This computer must also have the Remote Desktop Connection client software installed. The remote computer is known as the client. |
3. |
Both computers must be connected to the Internet through a VPN connection. Note: If you're not connecting to the host computer through a VPN, you'll need to use the actual IP address of the host computer instead of the computer name. |
To set up the Remote Desktop, start with the host computer, which in this example is your work computer.
1. |
Verify that you are signed in as the administrator. |
2. |
Click Start, click Control Panel, and then click Performance and Maintenance. |
3. |
Click System. |
4. |
Click the Remote tab, select the Allow users to connect remotely to this computer check box, and then click OK. |


Next, make sure you have Windows Firewall set up to allow exceptions.
1. |
In the Control Panel, click Security Center. |
2. |
Under Manage security settings for, click Windows Firewall. |
3. |
Make sure the Don't allow exceptions check box is not selected. |
4. |
Click the Exceptions tab, and verify that the Remote Desktop check box is selected. |
5. |
Click OK, and then close the Windows Security Center window. |
6. |
In Control Panel, click Performance and Maintenance, click System, and then click the Computer Name tab. |
7. |
Write down the full computer name, and then click OK. |
8. |
Close Control Panel. |


Part 3.
How to change the listening port for Remote Desktop
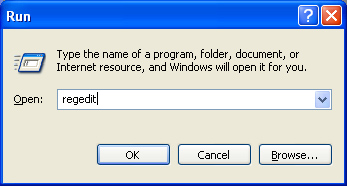
| 1. | Start Registry Editor.
|
| 2. | Locate and then click the following registry subkey:
HKEY_LOCAL_MACHINE\System\CurrentControlSet\Control\TerminalServer\WinStations\RDP-Tcp\PortNumber |
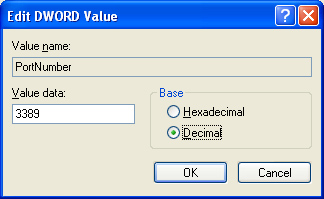
| 3. | On the Edit menu, click Modify, and then click Decimal. |
| 4. | Type the new port number, and then click OK.
|
| 5. | Quit Registry Editor. |
Part 4.
Connect your remote computer to the host computer
To connect your home computer, which is the client (or remote) computer to your work (or host) computer, follow these steps:
1. |
On your home computer, click Start, point to All Programs, and then point to Accessories. |
2. |
In the Accessories menu, point to Communications, and then click Remote Desktop Connection. |
3. |
In the Computer box, type the computer name of your host computer, which you wrote down earlier. |
4. |
Click Connect. |
5. |
When the Log On to Windows dialog box appears, type your user name, password, and domain (if required), and then click OK. |


To end your Remote Desktop session:
1. |
Click Start, and then click Log Off at the bottom of the Start menu. |
2. |
When prompted, click Log Off. |